I love the idea of Yarn bombing but I hate the idea of the yarn going to waste after the event. I just made one for my son's school and I designed it in a way the all of it can easily be used for items to donate for charity when it's all taken down next week.
 |
| Here I am installing the smaller of the 2 ribbons I used many shades to give it a fun look. This is made of 3 scarves and will be donated after so no yarn will be wasted! |
Get PERMISSION
I can not stress this enough depending on where you live it could be considered graffiti and that's a crime! Also you don't want all your hard work to be cut down and destroyed.... So when you get an idea sketch it out and make a proposal. Find out where you want to put it and apply for a permit or contact the owner.
In my case I emailed my son's school with my idea and sent them sample photos of what a yarn bomb is and I explained exactly what I wanted to do. THEY were THRILLED and even got some parents to make some of the squares for me!!!
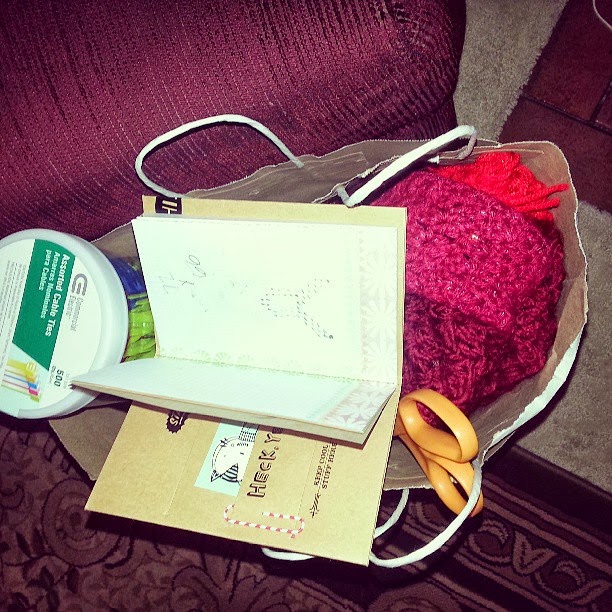 |
| Everything I needed besides my ladder I put into this large bag. |
Make a clear plan
I used graph paper for my square design as a blue print. I really hate the idea of wasting yarn and I didn't want to sew the squares to then have to carefully cut them apart and re attach them. So for my BIG 72 inch by 66 inch ribbon I used ZIP TIES to connect them to each other and the gate! It took me about 90 minutes to get it all up and I think I could do it faster now since this was my first time. My smaller ribbon I made out of connecting 3 scarves which I did put a seams which I can easily pull out. I used Zip Ties to connect it to the fence as well. Using the zip ties can be tricky at first. This being my first ever yarn bomb on a fence I am happy with the out come. For my next one however I already have ideas on how to fix some of the shaping errors. Practice makes perfect. If this is new to you don't expect it to be perfect and take your time. I strongly suggest taking a few steps back to look at it every 10 or so minutes so you can keep your self on point.
 |
| I worked from the center of the top out and then down so I stayed even... |
Know Why
Be prepared for people to ask why you are doing what you are doing. I did it for RED RIBBON WEEK which is a say no to drugs, smoking and drinking event that is held every year in all the elementary schools in my area. Red Ribbons started as a symbol people used to honor people who died from deaths related to drugs and red ribbon week started from there in hopes to prevent youths from ever getting involved. This cause is very close to my heart because I was homeless as a child and put in very dangerous situations due to my mothers drug problem. Now I know not all causes as this serious and hey maybe you want to add flowers to cheer up a fence THAT is awesome and be passionate about it and sell it. You have to believe in your work or no one else will.
 |
| The rest of this fence has decorations now and I will try to get a better photo later! This is about 6 feet tall! |
Have your Supplies
Yarn! make sure all your crochet, knit, loom knit ect is done and all tails are sewn in and try to have extra in case something happens. Have extra yarn, a crochet hook, scissors and a needle to make sure you can fix any mistakes or tweak things ZIP TIES/ CABLE TIES are key, Thank you to Laura Pavy of THE CROCHET CASE for that tip! If you are doing something tall make sure you have a ladder, ( a friend or two to help and steady the ladder) Plenty of light if you are not doing it in broad day light have a flash light or app on your phone so you can see well, also you may want your CAMERA to take pictures during the process
Don't forget to take it down
You should plan out a head of time how long your art will stay up and what will be done with it after.
Any questions? Or do you have ideas? comment below I would love to hear from you all!
Comments
Post a Comment