 |
| A simple but lacy stitch and Redheart Botique Magical make this shawl shine and work up in NO time at all! |
One on my newest friends and obsession on facebook is Onix . He has an amazing talent for many things but especially knitting! He has just started a Website and I just love looking at his work and chatting with him. ( you can also search his name on youtube for knitting how to videos with AFK) Today he posted a a quote about shawls I would love to share with you.
There are many mermaid legends in the folklore of the British Isles. One tells of a mermaid who fell madly in love with a sailor on a ship headed for the Shetland Islands. Her ardor was so great that king Neptune granted her wish to trade her tail for legs. As she started ashore, the mermaid realized that she needed earthly clothes. She fashioned a shawl from sea foam and wore it as she stepped from the water. Seeing the great beauty of the mermaid's shawl, the women of the island immediately took up their knitting needles and began to knit the now famous Shetland shawls to imitate the mermaid's sea-foam garment.
from the book" Folk shawls" by Cheryl Oberle
I get so inspired to create a shawl after reading that! I don't know about you but I used to dream about being a mermaid as a little girl and I get such a beautiful flowing image when reading the above quote. That being said I'm sure you are ready for the supply list and free pattern for the CHIQ TWILIGHT ( yes it sparkles but not that twilight, shawl)
 |
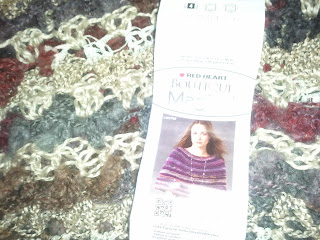
| Look at all the colors and textures!! I'm so in love with this right now! |
So I will start by saying the yarn is kinda pricey but I only spent 10.00 plus tax because i used 2 50% off coupons on 2 different trips. The retail price on this yarn is 9.99. To me it's worth it on this project because the yarn is part of what make this shawl so lovely and so quick! I used REDHEART BOTIQUE MAGICAL in the color crystal ball. This uses almost all of two balls however if you want to add an edging ( which I did not to keep the cost down and When I asked my friends over at The Crochet Crowd on facebook ( they are a great group join them and have fun sharing your projects or being inspired by what everyone else is up to!) they agreed it didn't need an edging.
Skil level and time
This is EASY!!!!! and can be done in 1 to 2 sittings for most crocheters
Supplies
2 balls of REDHEART BOTIQUE MAGICAL
I thing the REDHEART BOTIQUE CHANGES would look great as well as any bulky yarn :)
Size N crochet hook. I recommend not to use a metal one because your wrist will get tired sooner due to the weight.
Okay that's all we need
1 st Row Start with 76 foundation double crochet
Here is a great video on FDC I learned how to do it from this video however there are many to choose from on youtube!!
2nd Row Slip stitch to the 2nd stitch and chain 3 ( from here on out start every row like this) that counts as your first dc. dc again in the same stitch *skip one stitch, 2 DC in the next,* repeat until the end. Do 2 dc in the last stitch of the row. your row ends will be slightly wavy and due to the nature of the yarn some rows with bulk out more than the other
 |
| Here is a close up of my shawl when I first started |
 |
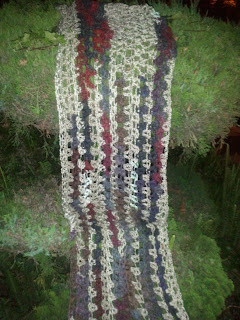
| Here is a not so close up but gives you an idea of how it looks at first. |
TIP There are 4 different yarns in this ball 2 of which contrast in the texture one is really bulky and one isnt to keep one side from looking wider try crocheting loose on your thinner parts of the yarn to keep all of your stitches around the same size.
Repeat row two until you have 8 rows with the skips and a total of 9 rows. Now you should be almost out of yarn on your first row.
Turn your piece and attach your new ball to your foundation double crochet row. start on the 2nd stitch of either end
follow the instructions for row 2 eight times. Your shawl will have a total of 17 rows.
I weaved in my ends and I was done!!! I didn't block mine but you could by laying it out and pinning it to shape then squirting with water and letting it air dry :)
For those that want an edging
Loopy and almost option
starting any where, chain 4 sl in each space on the side do 2 for every dc.
Solid just to even everything out
Hdc in each space, 2 on the sides for each dc
also tassels could be fun too!
What will you do? Please comment below!
 |
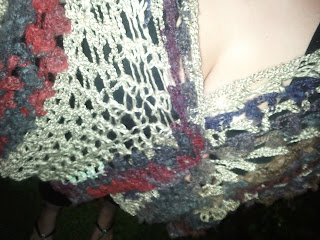
| Another view |
 |
| Did You find this pattern from CPC? comment below, check out more free patterns at cpc! |


I will have to see if I can get this yarn
ReplyDeleteThe yarn can be ordered through http://www.shopredheart.com if you can't find it locally. Other online sellers probably have it, too. Just search products.google.com for it. :-)
ReplyDeleteI love this scarf!!!!
ReplyDeleteI love this...I think it would be great with tassels. Thanks for the pattern!!
ReplyDeleteWhy is the print in this so small? It really makes me angry when people use this small font, it's unreadable!!
ReplyDelete