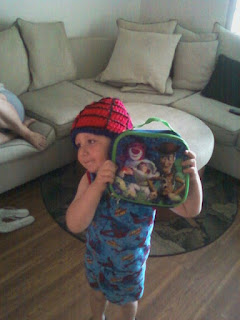
Who doesn't love your friendly neighborhood Spiderman?? I know I do and my boys love him dearly!!! Here is a picture on my son last year in his spider hat!!
 Now I have many versions to do this including using surface slip stitch but this is my first attempt and my favorite! The cool thing about the way it is you can do this to ANY ( crochet , knit, and loomed) beanie as long as it'd solid like the one pictured and not lace. Just make most of the hat red and the bottom inch or so blue :)
To start I will share my basic base hat
( if you want to make another type of hat scroll down for links )
Base Child Hat Pattern
Supplies
Red Yarn
Blue Yarn
Size J Hook
Make a magic circle,
Rd 1- ch 1 and 12 hdc in circle ( you can join each rounds with a sl and ch1 at the beginning of each round if
desired I worked in a continual round)

Rd 2- 2hdc in each
Rd 3 -1hdc in each

Rd 4- 2hdc, 1 hdc, repeat

Rd 5- 1 hdc in each

Rd 6- 2 hdc, 1 hdc, 1 hdc, repeat [ this is where I stopped increasing for my then 4 year old, for older children increase 2 more times ( Rd7 1hdc in each, Rd 8 2 hdc, 1 hdc, 1 hdc, 1hdc, repeat. Rd 9 1 hdc in each, rd 10 2hdc, 1hdc, 1hdc, 1hdc, 1hdc) then continue on with the pattern]

R7- 17/20 1 hdc in each ( basically until you almost have the length you want )
Last 2 rounds switch to blue, do one round of hdc, and the last round of sc. weave in your ends!
The Happy Children's knit hat from AFK
Here is a great knitted adult beanie pdf by the talented Onix Terevinto This one makes me want to knit!
This one is for the loomers by Kristen Mangus on AFK
OKAY****************************************************
Now that we have a base beanie let me tell you what to do.
I highly recommend watching the video because that is the easiest way to understand ( video should be released by Friday July 13th)
You need a Yarn Needle and black yarn
Before I explain here are some photos!

Tips, do not pull to tight or the inside of the hat will be unwearable!!! Start from the top. In the video I show starting with the rings and then adding the vertical line but go ahead and do it the way that you want.
I created the above webbing by using a yarn needle and black thread and stitching it in the design of the web. I started at the top by making rings all the way around the hat. I then stitched vertical lines down and WOW you have a hat any child ( or child at heart) would love!!
If you have any questions feel free to comment below!

To start I will share my basic base hat
( if you want to make another type of hat scroll down for links )
Base Child Hat Pattern
Supplies
Red Yarn
Blue Yarn
Size J Hook
 |
| For children's hats I use 2 strands to make them more sturdy! My boys love all of there character hats and I've found they last longer this way :) I get center pull skeins and pull from the center and out side, however you can use 2 balls too! |
Make a magic circle,
Rd 1- ch 1 and 12 hdc in circle ( you can join each rounds with a sl and ch1 at the beginning of each round if
desired I worked in a continual round)

Rd 2- 2hdc in each
 |
| I tend to use the tail from my magic circle as a yarn marker :) |

Rd 4- 2hdc, 1 hdc, repeat

Rd 5- 1 hdc in each

Rd 6- 2 hdc, 1 hdc, 1 hdc, repeat [ this is where I stopped increasing for my then 4 year old, for older children increase 2 more times ( Rd7 1hdc in each, Rd 8 2 hdc, 1 hdc, 1 hdc, 1hdc, repeat. Rd 9 1 hdc in each, rd 10 2hdc, 1hdc, 1hdc, 1hdc, 1hdc) then continue on with the pattern]

R7- 17/20 1 hdc in each ( basically until you almost have the length you want )
Last 2 rounds switch to blue, do one round of hdc, and the last round of sc. weave in your ends!
The Happy Children's knit hat from AFK
Here is a great knitted adult beanie pdf by the talented Onix Terevinto This one makes me want to knit!
This one is for the loomers by Kristen Mangus on AFK
OKAY****************************************************
Now that we have a base beanie let me tell you what to do.
I highly recommend watching the video because that is the easiest way to understand ( video should be released by Friday July 13th)
You need a Yarn Needle and black yarn
Before I explain here are some photos!
 |
| This is one with all the stitching but no blue border |
 |
| This is what it looks like before |

 |
| Start in the center, and work your way down. |
Tips, do not pull to tight or the inside of the hat will be unwearable!!! Start from the top. In the video I show starting with the rings and then adding the vertical line but go ahead and do it the way that you want.
I created the above webbing by using a yarn needle and black thread and stitching it in the design of the web. I started at the top by making rings all the way around the hat. I then stitched vertical lines down and WOW you have a hat any child ( or child at heart) would love!!
If you have any questions feel free to comment below!
nice job Mary!
ReplyDeleteThank you Onix!! It's an honor to be able to share a pdf pattern of yours with my readers!
Delete